Export Documentation
ALERT Documentation
Table of Contents
Introduction
Overview
Welcome to the ALERT User Manual.
ALERT is a supervision and alerting solution developed by Micromedia International. It monitors your infrastructure and notifies the right people when something requires attention.
What is ALERT?
ALERT collects data from your systems, applies rules and thresholds, and triggers notifications through various channels (email, SMS, voice calls, etc.) when conditions are met.
How to use this manual
This manual covers everything you need to get started with ALERT:
- Pre-requisites — hardware and software requirements before installation
- Installation — step-by-step installation guide
What's New
Overview
This page summarizes the new features and improvements introduced in ALERT 4.1.X.
New Features
Coming soon.
Improvements
Coming soon.
Bug Fixes
Coming soon.
Getting ALERT
Overview
This section explains how to obtain the ALERT software and installation media.
Installation Media
ALERT is provided on a USB installation stick supplied by Micromedia International. It contains the setup program SETUP.EXE along with all required drivers and modules.
Contact Micromedia
To obtain ALERT or request a new installation media, contact Micromedia International:
- Standard support: +33 4 76 04 11 00
- Technical support: +33 4 76 04 10 93
- Website: micromedia-int.com
Next Steps
Once you have the installation media, proceed to the Installation section.
Requirements
ALERT: Pre-requisites
Before installing ALERT components, ensure your system meets these minimum specifications.
Hardware Requirements
Processor
- 32-bit or 64-bit processor at 2 GHz or faster
- Minimum 2 CPUs required, 4 CPUs recommended for optimal performance
RAM
- 2 GB of RAM minimum required
- 4 GB or more recommended
Systems handling large data volumes, performing extensive lookups, or using scripts should have increased RAM capacity.
Storage
- Approximately 1 GB of disk space for the application installation
Display
- Minimum resolution: 1024 x 768
Software Requirements
Operating Systems
| Family | Supported Versions |
|---|---|
| Windows Server | 2025, 2022, 2019, 2016, 2012 R2 |
| Windows Client | 11, 10, 8.1, 8, 7 SP1 |
Microsoft Components
- .NET Framework 4.8 or greater (required for all client and server installations)
- Visual C++ Redistributable — latest version
- IIS 8.0+ recommended for web deployments, with required .NET features enabled
Database (Optional)
| Engine | Compatible Versions |
|---|---|
| SQL Server | 2022, 2019, 2017, 2016, 2014, 2012 |
| Microsoft Access | 32-bit |
The SQL Server Native Client 10.0 driver is required for database operations.
Virtualization
The following virtualization environments are supported:
- VMware ESX
- Microsoft Hyper-V
- Oracle VirtualBox
Installation
Overview
The installation process begins by plugging in the installation USB stick. The setup program SETUP.EXE will either launch automatically or needs to be started manually from the USB root directory.
Installation Steps
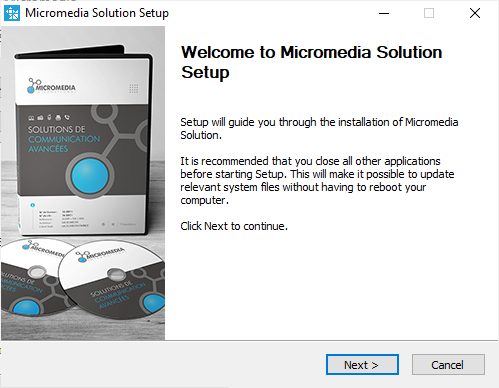
1. Initial Prompt
Plug in the installation USB stick. If the setup program does not start automatically after a few seconds, launch SETUP.EXE from the root of the USB stick.
Click Yes when prompted to proceed.
2. Language Selection
Several languages are available. This choice only concerns the current installation — the software language can be customized after setup completes.

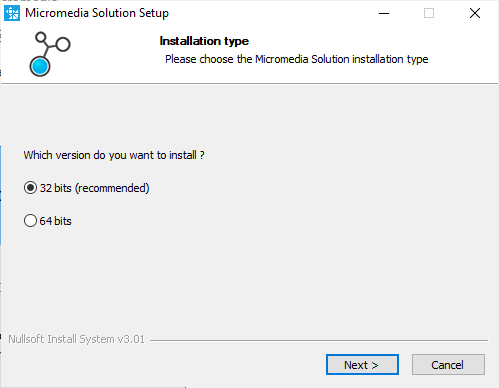
3. Version Type (32-bit vs 64-bit)
Keep the default 32-bit selection unless you have specific requirements, even on a 64-bit Windows system.
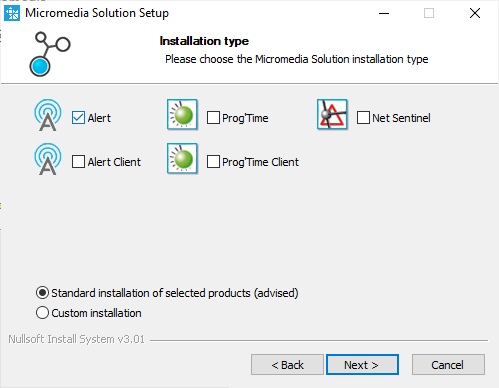
4. Software Selection
Check the box for Alert and use the default installation option. This installs all modules including drivers, mediators, and plugins. Individual elements can be activated within the software afterward.
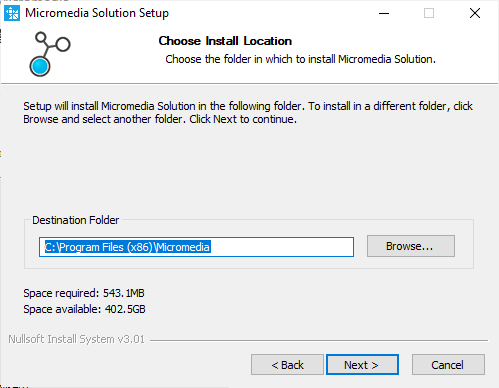
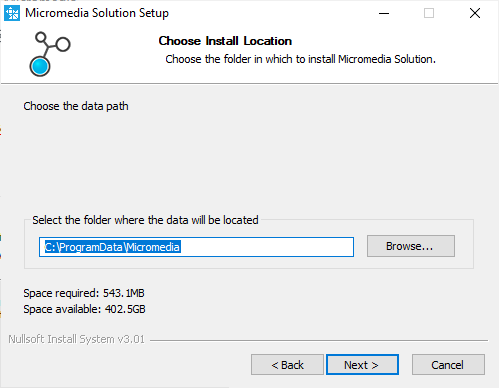
5. Installation Folders
Two directories are required during installation:
| Folder | Purpose | Default Path |
|---|---|---|
| Binaries folder | Programs and modules | C:\Program Files (x86)\Micromedia |
| Data folder | Configuration files | C:\ProgramData\Micromedia |
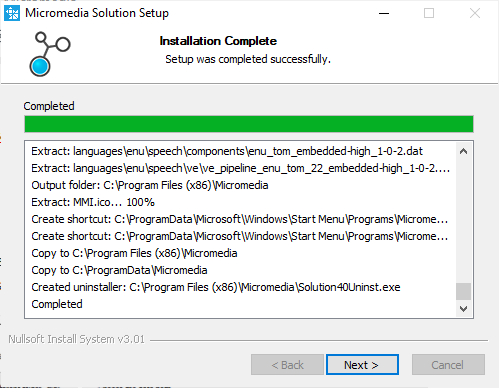
Next Steps
After installation completes, proceed to register your license and launch ALERT.
License
Overview
License activation differs based on whether you use a USB dongle or a software license key.
Hardware License Key (USB)
After installing ALERT, connect the USB dongle. Windows automatically recognizes and configures it.

Launch ALERT through Start menu > Micromedia > Alert 4.0.
If a license file was included on the installation media, it is already copied to the correct directory. Without a license file, ALERT launches in demo mode.
Once you obtain your .lic file, click Register... to add it (administrator privileges required). The file defines which options are enabled.

If the dongle is not recognized after connection, refer to the article "USB protection key not recognised."
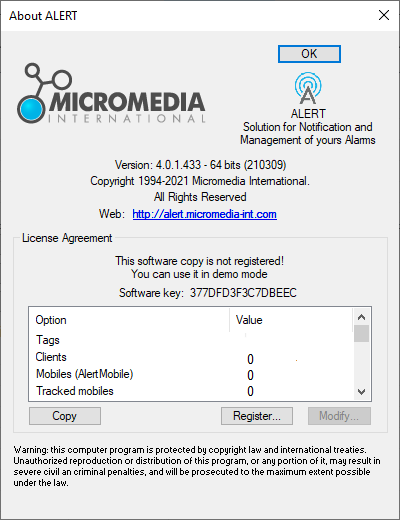
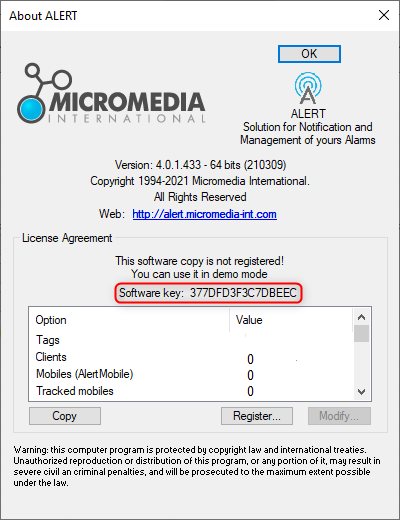
Software License Key
No USB dongle is needed. ALERT generates a unique code from your computer's hardware components.
At startup, ALERT displays a dialog box. Double-click the software key to copy it, then send this number to Micromedia to generate your associated .lic file.
Once received, click Register... and add the file. Administrator privileges are required.
License Renewal
During renewal, Micromedia sends a new .lic file. Load it via Help > About ALERT > Register. Select the new file matching your key and confirm the privilege escalation prompt.
Starting ALERT
Overview
Launch ALERT by selecting Alert 4.0 from the Windows programs list under Micromedia.
Login Process
Upon opening the main window, you must authenticate before proceeding. Two methods are available:
![]()
- Select the Login command from the File menu
- Click the login icon on the toolbar
Enter your credentials in the dialog box that appears.

For the initial setup when no operator is configured, use the default username ALERT with no password.
Next Steps
Once logged in, ALERT is ready to be configured. Proceed to the Configuration Process section.
Configuration Process
Overview
The primary function of ALERT is to contact operators as soon as an alarm is triggered. Following a structured configuration approach streamlines the setup process.
Operating Principle vs. Configuration Process
The operating principle flows from alarm to operator notification. The configuration process reverses this direction, moving from operators backward to alarms.
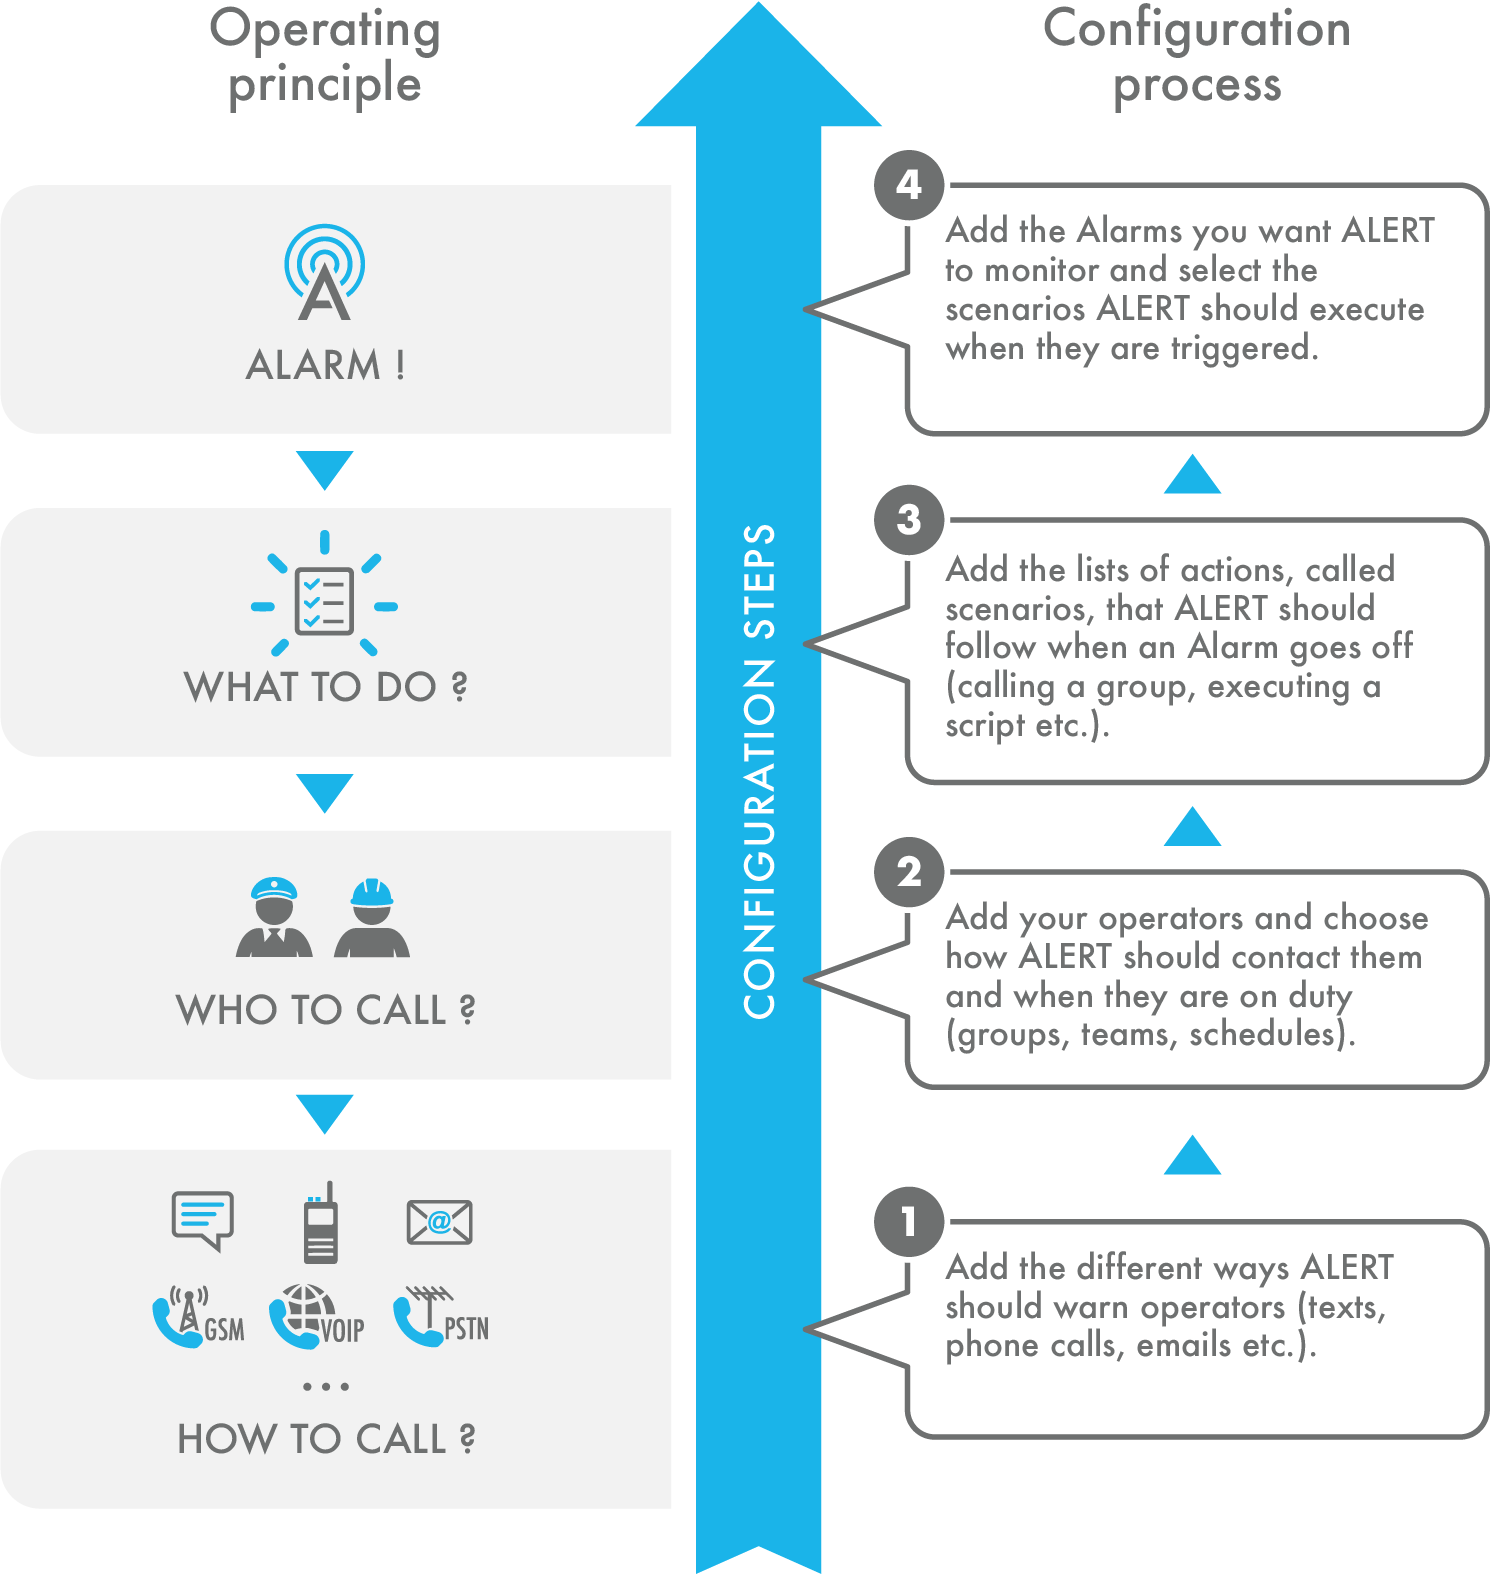
Key advantages of this method:
- Determine desired operating modes before programming ALERT
- Simplify setup through sequential, dependent steps
Communication Channels
To notify on-duty operators and transmit alarm data, you must define and configure the software and hardware that ALERT will use.
For most applications involving voice calls, SMS, or fax transmission, a modem connection is necessary. Modems may be:
- External devices (serial or USB connected)
- Internal cards (PCI or PCI-express)
Configuration covers:
- GSM vocal modems — for voice calls and SMS
- SIP connections — for VoIP capabilities
Add a GSM Modem
Overview
A GSM vocal modem enables voice calls and SMS functionality in ALERT. The modem must be connected to the machine directly on a serial port, or through a USB/Serial adapter, with an active SIM card inserted.

Adding the Modem
You must have sufficient administrative rights to perform this configuration.
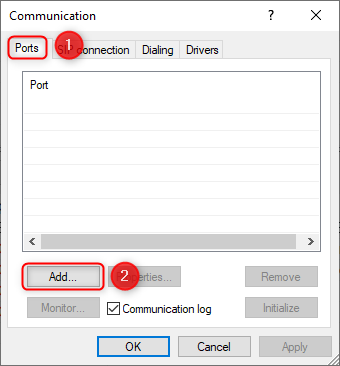
- Open the Configuration menu and go to Communication
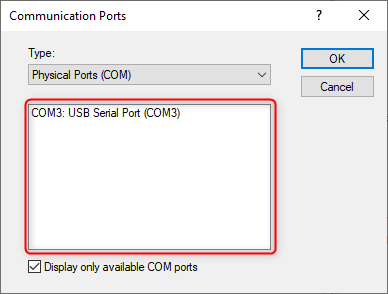
- Navigate to the Ports tab
- Select the appropriate COM port (e.g. COM3)
- Confirm the addition
Configuration Requirements
Enable the following two checkboxes:
- Voice Modem
- GSM/PCS Modem — required to allow voice calls
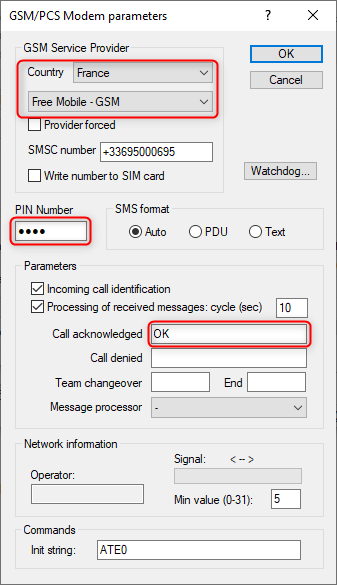
GSM Settings
Configure the following parameters:
- Country and SIM card provider identification
- PIN code entry
- Default parameters for call acknowledgment
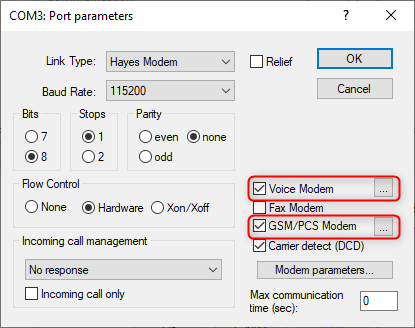
Voice Settings
The default modem supplied by Micromedia requires speed adjustment only if connected directly to the motherboard serial port (115200 baud rate).
Result
Once configured, the modem is enabled — the added port appears in green in ALERT.

Add SIP Connection
Overview
Configuring a SIP (Voice over IP) connection in ALERT 4 requires two main steps: establishing a connection to the SIP system and creating a communication port.
Step 1 — Add a SIP Connection
- Open the Configuration menu
- Go to Communication > SIP Connections
- Add a new connection
SIP Tab
Your SIP provider supplies the following required parameters:
| Parameter | Description |
|---|---|
| Telephone number | Assigned number from the provider |
| SIP address | SIP service provider address |
| User ID | Connection credentials |
| Password | Connection credentials |
| URI format | sip: number@address |

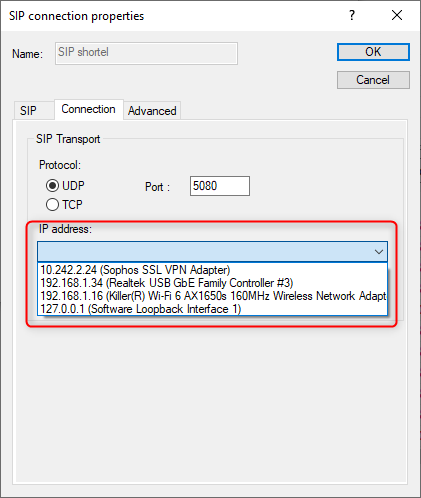
Connection Tab
Select the network interface to use for SIP communications.
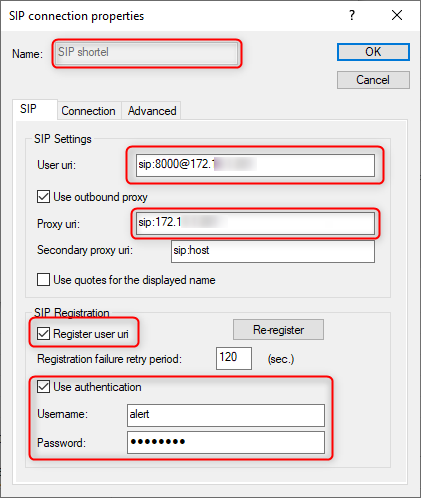
Upon successful validation, the ALERT event log confirms registration with the provider.
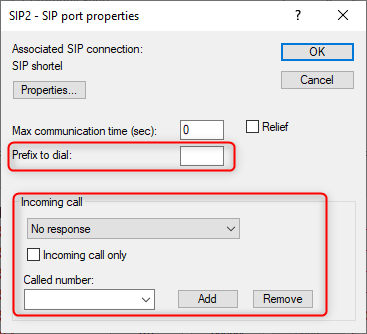
Step 2 — Add a SIP Port
Once the connection is configured, add a SIP port to enable calling:
- Select the appropriate SIP connection
- Specify any necessary call prefixes
- Configure incoming call parameters
- Choose an answering driver or No response
- Reserve the port for incoming calls if needed
![]()

A green LED indicator confirms proper port configuration. Multiple concurrent calls require additional SIP ports if the provider supports it. The vocal driver must be enabled in ALERT.
Developer Center
Developer Center
Welcome to the ALERT Developer Center. This section provides technical references, API documentation, and integration guides for developers.